Showing posts with label Fabric. Show all posts

Wednesday, July 30, 2014

What I'm Working On Wednesday

Today, I'm working on a couple of things:

Etsy Shop Production

I've kind of let my Etsy shop sit dormant for a while because I haven't had a lot of sales. I even considered closing up shop, but just this week I decided I'd like to give it another try. So I've start mass-producing Christmas stockings to get them listed later this week. If you're in the market for new stockings this year, keep an eye out for my new inventory. And I'm always happy to do custom orders and may even offer custom embroidery.


Cub Scout Arrow of Light Awards

I only have two weeks to finish up the Arrow of Light awards I've started on. Come see the hand painted plaques I made in this post. This week, I'm working on putting together each boy's award arrow to hang below his plaque. I'm using arrow kits I found at Nature-Watch. I like these arrow kits better than the ones at the Scout shop because these ones have stone arrowheads. I'll post an update once they are finished so you can see the final product.

Organizing a Days for Girls Sewing Event

I am the team leader for the South Jordan, Utah team for Days for Girls International. In September, I'm hosting a sewing day for anyone who wants to help! If you're in the Salt Lake City area, come sew with us! See the event details & RSVP on Facebook here. If you're not in the area, but still interested in helping out Days for Girls International, check out their website and find a chapter or team near you!


What are you working on today?

Friday, July 25, 2014

Octagonal Window Covering

We have an octagonal window in our master bedroom. If you have the misfortune of also having an octagonal window in your house, you know how difficult it can be to find a window covering for it.


Our master bedroom is very long and up until late last year, our bed sat on the opposite end of the room from this weird window. We've gotten used to having a fair amount of light shining into our room. Our town home is on a courtyard and we have many neighbors who leave their porch lights on all night long, which illuminates our room.

When we began prepping our home for sale, we decided to do some rearranging. This put our bed (specifically MY side of the bed) right under the octagonal window. Did I mention this window faces east? During the winter, this wasn't a big problem, but once the sun started coming up before 7 AM every day, it became unbearable. I knew I needed to find a solution.

So, I set out to create a covering for this weird window. I succeeded, but it was so hard that I could not even attempt to write up a detailed tutorial. But, since these oddly shaped window coverings are so hard to find, I want to give you some idea of how I made this, just in case it can help some other poor octagonal window owner in the future.


First, get a pencil and a sheet of paper (or two or three) and a measuring tape. Measure and document the following:
  1. Each side of the octagon. That's right -- all 8 sides. Why? Because they probably are not exactly the same. I know mine aren't. My side lengths vary up to 1/4". I ended up averaging them.
  2. The total width of the octagon (from left to right... or right to left).
  3. The total height of the octagon (in theory, this should match the width, but again, mine didn't).
  4. The sides, width, and height of the window frame.
Once you have all these measurements written down and possibly drawn out, you are ready to start.

Next, select your fabric. I didn't want to spend money on this in case it was a huge embarrassing failure. I used some leftover blackout lining for the back. For the front, I used cotton. The red prints are Stampin' Up! fabric. I also used some off-white muslin.

Now, starting with the lining, draw your shape onto your fabric. Be sure to add a bit for seam allowances. I am terrible at math and haven't used geometry since the 8th grade, so this part was really difficult for me. Ultimately, I drew a large box using the width and height of my octagon. Then I found the center of each side of the box and measured out my octagon sides from there. My lining ended up with a lot of extra lines because I had to start over a few times.

Once you've gotten your shape drawn onto your lining and you're sure it's big enough to cover the window, cut it out!

Do the same with your other fabric. My floral fabric was actually a fat quarter, so it was not quite large enough to cover my window. I pieced my fabrics together to make it big enough before drawing and cutting.

Before you sew your pieces together, you'll need to add some loops across the back to feed your curtain rod through. Place one loop near the middle, then one close to each edge. Sew those onto your lining.

Now, pin your fabrics together, right sides facing. Sew around, leaving a space for turning. Flip it right side out, stitch your gap closed, then top stitch around the entire thing. Feed your curtain rod through.


You can see that my top corners do not stay up straight because my fabric is not very stiff. At the top of the curtain, I have added a few little squares of velcro with adhesive velcro stuck to the window frame. This keeps it up well enough that I am no longer roasted awake each morning at 6:25 AM. Mission accomplished, and though it is not perfect, it is good enough for me!

Do you have any oddly shaped windows in your house? I'd love to hear what solutions you've come up with.

Monday, June 16, 2014

How to Restore, Repair and Finish Almost Everything

We spent the weekend at my hubby's family cabin outside of Oakley, Utah. It was cabin clean-up time, so the whole family gathered to clean out the cabin and the surrounding woods. It was a fun time for everyone to get together, and we were so busy cleaning, we didn't take any photos. One of the best things to come from this get-together was this gift from my mother-in-law:


Earlier this spring, my husband's maternal grandmother passed away, and since then, my mother-in-law has been going through Grandma's things and trying to determine where all these things should go. That is how she happened upon this book, which she then decided to pass on to me!

Now, I realize that most (or all) of the information in this book can probably be found online, but I love books for a multitude of reasons (the least of which is that they smell fantastic). Plus, it's nice to think that Grandma and I have similar interests. So I plan to hang on to this one.

Besides, I think this gluing chart could be very handy. I have honestly never thought about gluing fabric to glass or paper to leather, but now I might. This chart is giving me ideas...


And I especially can't wait to read this section:


Wednesday, May 14, 2014

Fabric-Covered Magnet Board

Today, I am working on a project that will (hopefully) help me be a bit more organized -- a fabric-covered magnet board. I have tried this project before using one cut of solid-colored fabric, but today I wanted a version that would be more interesting. So, I pieced it!


Here's a tutorial:


I started with a simple cardboard-backed magnet board that I found on clearance at Target. It is about 11.5 inches square.

Choose your fabric. For my fabric, I chose three coordinating prints.

This fabric is some that I got from Stampin' Up! They have discontinued their fabric, but several of the lines are still available on clearance. It comes in sets of three fat quarters and is currently priced at $3.99/set. Go check it out!

Cut your fabric. Once I selected my fabrics, I cut them random sizes. I used 45 degree angles to make the piecing easier.


Piece the shapes together until they are large enough to cover your magnet board.

Remember, when you're piecing fabric, press your seams down after you sew each one. This will help the finished piece lay flat and makes it much easier to avoid bunching. 


Trim your pieced fabric down to fit across your magnet board.

Be sure to take the sides of the magnet board into account and leave enough fabric so that it can wrap around to the back. Give yourself at least an extra inch on each side, depending on the thickness of your board.


Attach your fabric. This can be the tricky part. Lay your fabric wrong side up, then place your magnet board face down on top of it. Do your best to center your magnet board, then pull one edge to the back and staple it in place. Make sure everything is still centered, then pull the opposite edge of the fabric to the back and staple that in place.

This is just like upholstering a cushion. Make sure you always move to the opposite side for every new staple, pulling the fabric snug as you go. This should make the fabric evenly tight across the front of the board.

For the corners, take your time! Tuck and fold until you can get the corners as flat as possible, then put in as many staples as you need to secure them. They don't need to be pretty on the back as long as they're pretty on the front!


Rock it! Find somewhere to hang your new masterpiece and get some cute magnets to match!
Creative K Kids

{Linked on Content in the Meantime, Someday Crafts, Handy Man Crafty Woman, The Crafty Wife, Family Home & Life, Wine & Glue, Pig & Dac, Sew Much Ado, The Turquoise Home, Fluster Buster, Gingerly Made, Makin' It In the Mountains, Denverista}

Monday, March 24, 2014

New Product Line

I am so excited to be introducing a new product line into my Etsy shop this week: boys' vests! As part of this unveiling, my talented graphic designer hubby, Dave has helped me redesign my blog and shop to reflect my broadening range of products.

Here is a sneak peak at the vests that I will be listing in the next few days:

Aqua Gingham

Spring Plaid

Charcoal Herringbone Check
I plan to offer vests in a variety of sizes and prints, so be sure to stop by the shop later on this week to see them all! And don't forget to take advantage of my spring sale going on through the end of April (coupon code: SPRING10)!

Monday, November 11, 2013

Easy Throw Pillows

My kids are really hard on throw pillows. After our last purchased pillows became completely flat and partially unstitched, I decided that it would be less expensive to just make my own. Of course, the best part about making my own is that I can choose my own fabrics and sizes.

The even better part is that I used fabric from Stampin' Up! My hubby works there so I got a great deal on it, but you can get a pretty good deal, too. They have discontinued their fabric line, so all their fabric is on clearance. (Click here to check out what they have.)


Now on to the throw pillows! All you really need to make a pillow is fabric and poly-fill stuffing. Choose your size and cut accordingly. Sew the edges, leaving a 4-5 inch gap. Turn it right side out, then stuff with fluff! Make sure you get the stuffing well into the corners and equally spread so the pillows don't turn out lumpy. On two of my pillows, I did decorative top-stitching around the edges to add a bit of detail.


I made several sizes, but kept them all square or rectangular so that I didn't have to sew any curves. The largest one I made is 15 inches square and I think it is a little small if it was going to stand alone on the end of the sofa. But grouped with a couple of smaller pillows, I think they are pretty cute.

And naturally, one of them already got messy toddler face prints on it before I got a chance to Scotch-gard it. I also think I will make slipcovers for each size in various prints so that I can change up the look without having a ridiculous amount of pillows to store in my tiny house!

{Linked on Huckleberry Love, Carrie This Home, Sew Can Do, All Things Fee, Serendipity & Spice, Our Delightful Home, Ladybug Blessings, Nap-Time Creations, Inside BruCrew Life, Cedar Hill Farmhouse, Coastal Charm}

Friday, October 25, 2013

Easy Pincushion Project

Next week, I am going to start teaching some of the neighborhood kids how to sew. In preparation for our first project, I whipped this pincushion up today in about 20 minutes. I thought I'd share a quick tutorial here:


Materials

  • Pincushion base of some kind -- I used a small plastic container that used to hold buttons. You could also use a simple cardboard circle. Anything will work as long as it helps the cushion retain its shape!
  • Fabric scrap, approximately 6 inches square (will vary depending on the size of your chosen base).
  • Ribbon
  • Poly-fill batting
  • Pins!

Instructions

Step 1: Cut your fabric into a circle. It doesn't have to be perfect, but getting rid of the corners will help reduce bunching later on.

Step 2: Cut 1 small triangles at the edge of each quarter of your fabric, coming in about an inch from the edge. So you'll cut one at the top, one at the bottom, and one at each side making them fairly evenly spaced on the circle.

Step 3: Fold your fabric right sides together and sew each triangle closed.

Step 4: Sew a loose basting stitch around the edge of your circle, then pull the thread and gather your circle into a pouch.

Step 5: Fill with batting. This will take a lot more batting than you think. Mine took 3 handfuls. Just fill it until you can't stuff any more in and the cushion is firm.

Step 6: Pull the thread and cinch your cushion closed. Tie off your thread.

Step 7: Attach your cushion to the base. Since my base was a circular container with sides, I simply hot glued my cushion to the bottom and sides of the container. Make sure it is secure all around.

Step 8: Embellish with ribbon or whatever you like!

{Linked on The Stitchin' Mommy, Happy and Blessed Home, Finding Fabulous, Truly Lovely, Sincerely Paula, Craftionary, The Jenny Evolution}

Saturday, October 19, 2013

DIY Halloween Costumes - Glowing Skeleton and Disney's Backson

This originally posted last week on Blissful and Domestic. Thanks again to Danielle for having me!

DIY Glowing Skeleton Costume Tutorial

Step 1: Gather your materials.

For this skeleton costume, I found a long-sleeve black shirt and black sweat pants from Wal-Mart. I also found some skeleton gloves and glow-in-the-dark skeleton knee socks in the dollar bin at Target. I also used white chalk and glow-in-the-dark fabric paint (3 bottles) found in the craft section of Wal-Mart or at Hobby Lobby.

Step 2: Draw your bones with chalk first!


I found a diagram of a human skeleton and used white chalk to recreate the bones on the black shirt and pants. Chalk was great for this task because I could easily rub it off and re-draw a portion if needed.  Doing it this way first, I was able to get the scale of the bones right and make sure I didn't run out of space on the clothes. This can also be a good place to have your child try the costume on to make sure the bones are in the right places.

Step 3: Paint!


I don't have a lot of experience with fabric paint, so I was surprised at how much paint I actually used. I ended up buying three bottles of glowing fabric paint. Paint one bone at a time, outlining, then filling in. I did my best to get the paint an even thickness, but you can see on the pants that one side is thinner than the other. It still glows like I want, so I decided not to worry too much about that. The bottle says that the paint will take 4 hours to dry, but obviously, this depends on the thickness. Mine took 5 or 6 hours to dry since I was going for complete coverage. Keep in mind that with this much paint, it will be somewhat stiff when dry.


And you're done! See, I told you it was quick. Of course, if you're unable to find the socks and gloves at Target, you might feel the need to paint those, too. For trick-or-treating, we plan to paint Eddie's face using glow-in-the-dark face paint.

DIY Backson Costume

Step 1: Gather your materials.

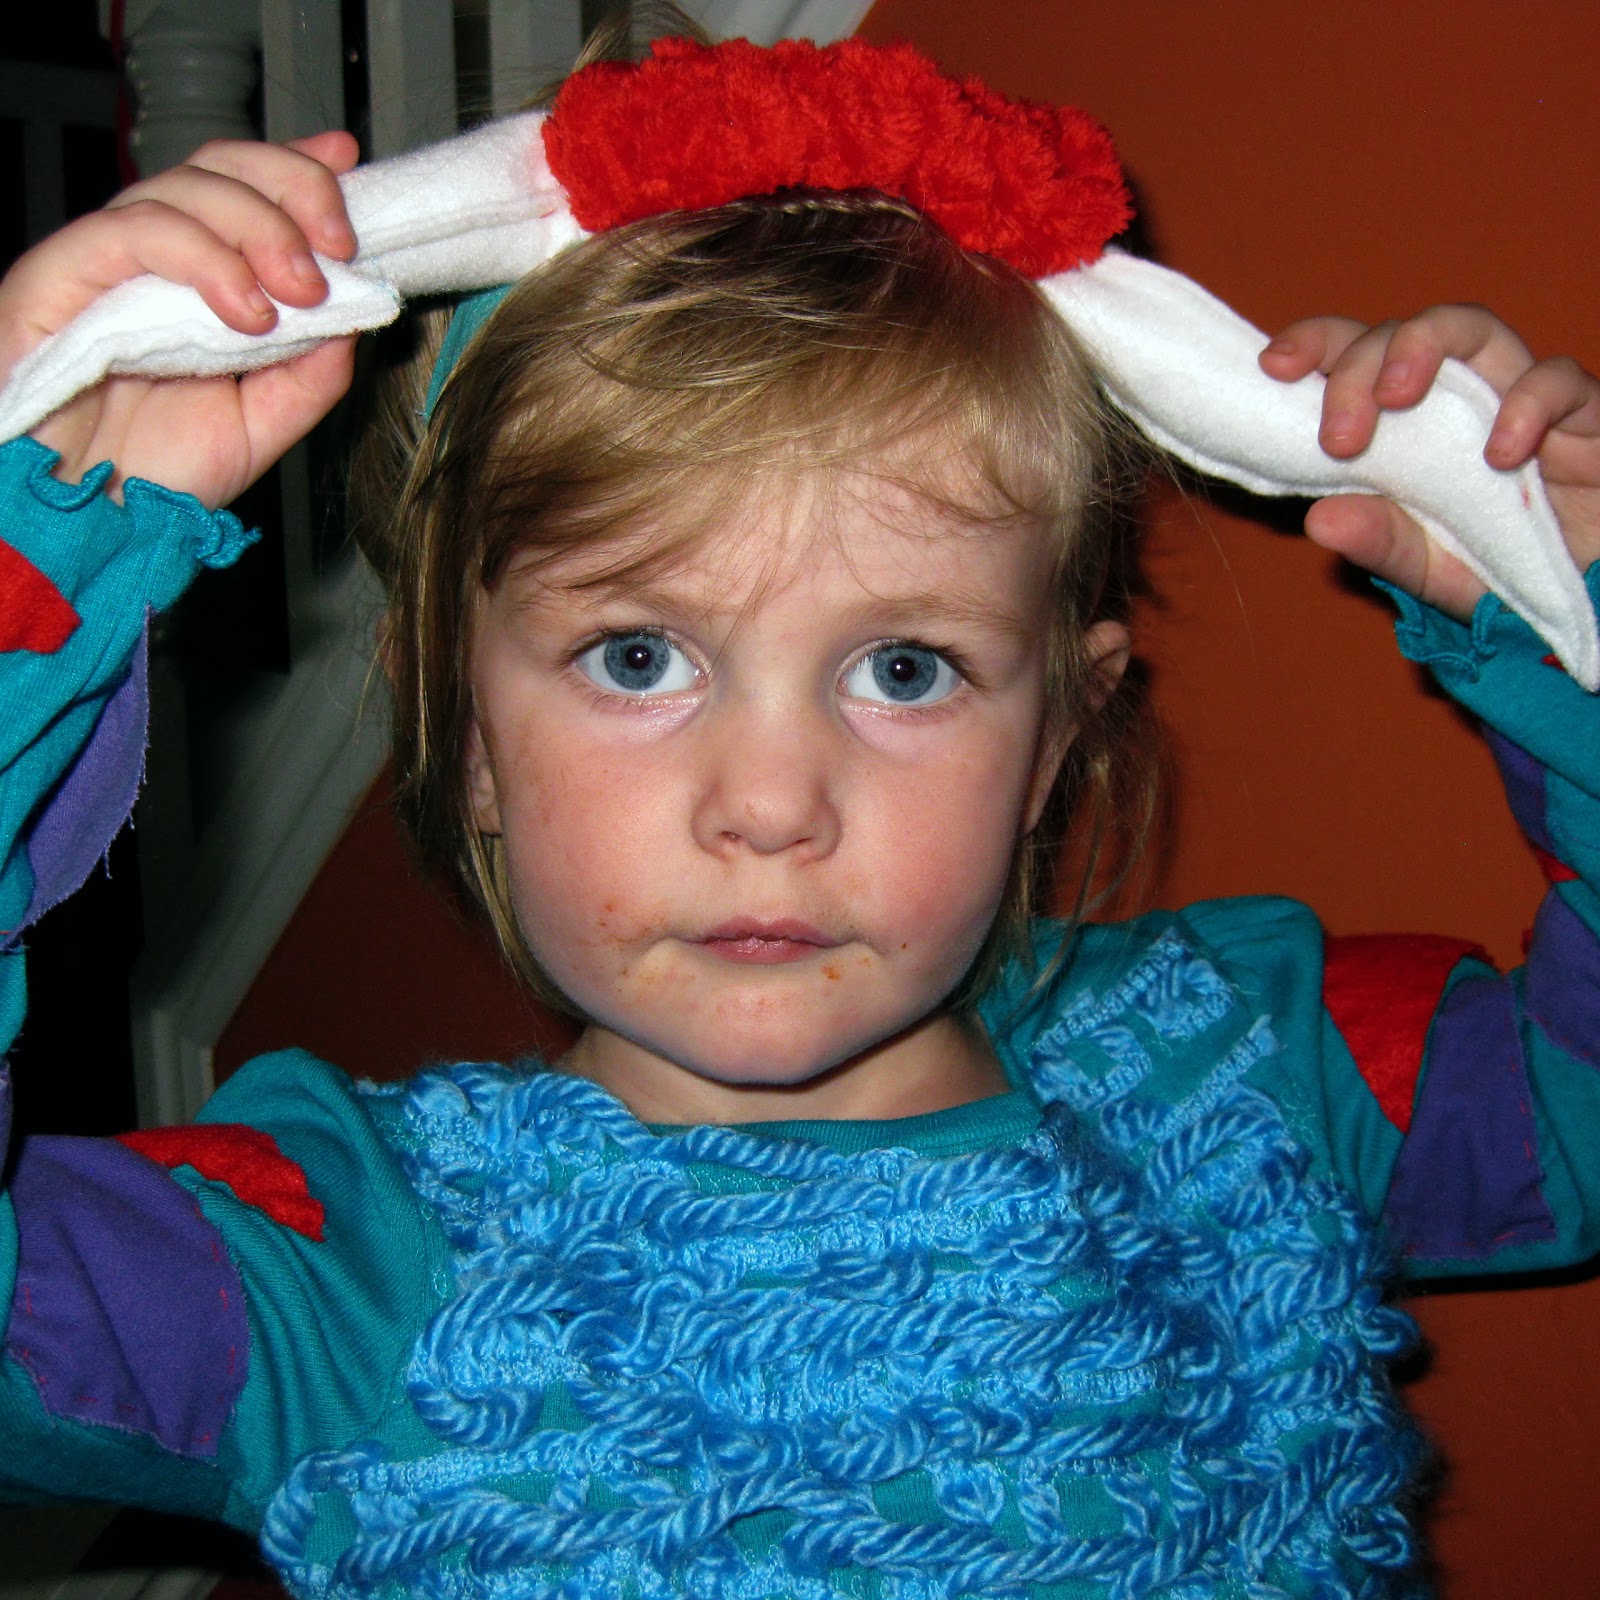
For the Backson, I found a pair of purple velour pants at Wal-Mart that were perfect. I also purchased an inexpensive turquoise t-shirt to use as the base for the top. The top consists of the t-shirt, blue yarn, red felt, and purple fabric scraps. The tail consists of purple fleece and poly-fil batting. The horns consist of non-roll elastic, red minky fabric scraps, white felt, and poly-fil batting.

Step 2: Construct the top.


For the top, I used chunky blue yarn to create a "furry" effect. I looped the yarn in small loops across the shirt in rows and pinned it in place. Then I sewed each row down with my machine using a looping stitch. You could probably do a straight or zig zag stitch that would work just as well. I trimmed off the excess yarn at the ends. I tried to space the looped rows evenly.


When I finished, I thought it looked too sparse, so I added more loopy rows between the original rows to bulk it up. The end result is a loopy, chaotic, fuzzy blue "fur."

For the sleeves, I cut triangles of red felt and used some purple scraps I had on hand. I hand stitched the red triangles on first, spacing them out so there would be four stripes per sleeve. Then I did the same with the purple scraps so they alternate.


Step 3: Construct the tail.

For the tail, I used a tutorial by Jessica from Running with Scissors found on Tatertots and Jello. Her tutorial is to make a dragon tail, so I made a few simple modifications to turn mine into a Backson tail.

To make the tail, follow Jessica's tutorial for the cutting, but leave off the spikes. Then, when pinning the body of the tail together, add a couple of turns, like this:


Now, when you sew down the top and bottom of the tail, make sure you include those gathered areas in your sewing. You don't want to end up with holes instead of turns.  It looks messy, but this part will be on the inside of the tail.


Then, complete the tail as Jessica says. Once you stuff your tail with batting, it will stick out (the more batting, the stiffer it will be) and you'll be able to see the shape better.


Step 4: Construct the horns.

Since Violet is a toddler/preschooler, I knew I needed something simple and comfortable so that she would leave the horns on her head. So I opted to make them a headband. I used some 1-inch non-roll elastic that I had on hand (originally purchased at Joann). I cut my horn shapes out of white felt, then sewed around the edges on my machine with contrasting thread (but leave the base of each horn open). I stuffed each horn full of batting, being careful to cram it down into the very tip. Then I hand stitched each horn onto the elastic.

Before sewing the second horn on, make sure you see how it looks on your kid's head. I originally put my horns too far apart and had to remove one and move them closer together. If they're far apart, they will stick out to the sides more.


Once the horns were attached to the elastic, sew the ends of the elastic together to form a headband. Then, to add the "mop of red" hair on top, I hand stitched a rectangle of red minky onto the headband, gathering it up as I went. The gathers helped add a little bit of shape to the "hair" so that it doesn't just lay flat.

Step 5: Accessorize.

I forgot to get photos of this part, but the last thing a Backson needs is some purple gloves with black fingernails painted on. For older kids, you also might be able to add a nose ring, but I'm sure Violet would not agree to wear one.


And you're done!

{Linked on Sewlicious Home Decor, Be Different...Act Normal, With A Blast, Get Your Crap Together, A Night Owl Blog, C.R.A.F.T., Sew Can Do, Scattered Thoughts of a Crafty Mom, Three Mango Seeds, Carrie This Home, Huckleberry Love, Sumo's Sweet Stuff}

Monday, September 23, 2013

From Blunder to Wonder... Lengthening Roman Shades


I made a major blunder last week when I ordered new Roman shades for the doors in our kitchen... they were too short! I ordered them from Window Blind Outlet and got a fantastic price, but I wasn't so careful about measuring before placing my order. In my defense, the shades I ordered only came in one length... four inches shorter than my window. I just assumed that shades made for doors would be a standard length. I assumed incorrectly.

Anyway, the shades arrived and looked fabulous until we hung them up and realized my mistake. So then I faced a dilemma... to send them back and try to find another set, or to make them work somehow.

Obviously, I decided to make them work! Back when I recovered our dining room chairs, I had ordered the fabric with the same print in two different colors (intending to eventually recover our barstool cushions too). This lovely grey fabric had been shoved into a bin to be used when I got around to it. So I pulled it out and decided that the shades needed it more than the barstools did.

If you are going to attempt a project such as this, please consider the following things that I learned in the process:

  • If you're altering shades for windows that are side-by-side, be careful to match up the print.
  • Measure thoroughly before you start so you don't waste fabric.
  • Roman shades have stiff slats that are not easily maneuvered through a sewing machine. Be patient and make sure you have some space around you when sewing!


Ultimately, this project was pretty simple and I love the results. I figured out how much fabric I wanted to add to the bottom of the shade, cut two strips with matching print, hemmed all sides to the correct size, then sewed it to the bottom of the shade, just above the bottom slat. I did the same on the valance.

I love that the grey and white print breaks up all the white of the doors and the shades. And these shades really are a great quality for the price!

Have you ever taken one of your blunders and come up with a creative solution? I'd love to hear about it!
The-Casual-Craftlete

{Linked on Carrie This Home, Sew Can Do, Uncommon Designs, Sumo's Sweet Stuff, All Things Fee, Serendipity and Spice, DIY Home Sweet Home, This Gal Cooks, Be Colorful, I Should Be Mopping, Craft-O-Maniac}

Tuesday, September 10, 2013

DIY Cropped Toddler Jacket

Every time there is any mention of scheduling family pictures, I immediately become obsessed with finding the perfect outfits for everyone to wear. My extended family is planning family pictures in October, so of course, I already know what we're all going to wear. We're going for fall colors and my little family will be wearing olive green, orange, and tan. I found a fabulous orange dress on summer clearance for my 2-year old, but since the photos will be taken at the end of October, I figured I should plan on cooler weather. So I figured I'd whip up a little jacket for her to wear over her sundress.

Luckily, I found the perfect tutorial from The Sewing Rabbit for a "Gathered Pocket Jacket."


Be sure to click through and check out the photos and tutorial. The tutorial was very easy to follow and turned out super cute! I made a few modifications, which I'll explain below.

My original idea was to make Violet a military-ish jacket in olive green. I found some olive green polka dot fabric on clearance at Hobby Lobby and my idea evolved. Here is how mine turned out:


Since I opted for a lighter-weight cotton, the jacket's drape isn't quite what I was hoping for. I lined it with silky ivory lining and added some lace detail on the pockets. My jacket ended up with a different neckline than the original, so instead of using buttons, I folded the corners back and tacked them down with a couple of stitches so it has lapels.

I think that, all things considered, it turned out really well and Violet loves her "coat." Since I still have 6 weeks until family photos, I'll probably mess around with it some more to see if I can get it fitting better (i.e., narrowing the sleeves). 

RomanceOnADime.com

Tuesday, August 6, 2013

Sewing Basics -or- Combining Colors & Patterns


Today's basic sewing advice is in regards to combining colors and patterns. You can find a great post about how to do this on The Handmade Home. But I'll give you my two cents as well!

Find Inspiration

Anyone who has seen my home knows that I am not afraid of color. We get comments on our paint colors quite often. See, when we bought our townhome six years ago, we were excited to stop renting a place with nothing but dingy white walls. Our first order of business was to jazz our new home up with some wall color. We have a vintage-y looking poster hanging in our living room that we both love, so we pulled a color out of that to use as our wall color. We painted our living room orange. Every person who comes to our house for the first time comments on the orange walls. After six years, I hardly notice them any more.

The poster that inspired our wall color.

Here's my point: find something that you love and use a color from it! Our orange walls work because the color came from some of our existing decor and we have kept our furniture fairly neutral.

Contrast Is Your Friend

Obviously, this will depend on your personal taste, but I think you can't go wrong by introducing a little contrast into your decor. You can use contrast with color or pattern (or both at the same time). Check out The Handmade Home post for examples of how to do this.

When In Doubt, Try It Out

If you find yourself struggling to make a decision on a bold color or pattern, see if you can get a swatch of the fabric or sample of the paint so you can try it out in the space for a few days. Buy a fat quarter of the fabric and make a throw pillow first. Or incorporate the most bold elements in smaller doses. And if you make a big change and end up hating it afterward, don't be afraid to admit the mistake and try again!

When we first painted our kitchen, we chose a medium green (Sherwin Williams "Tupelo Tree") and painted all four walls.


We forgot to factor in the lack of natural light in our kitchen. We have no windows in the room except for the French doors on one end. With the darker paint, the other end of the room ended up gloomy, especially on the countertops under the cabinets. We lived that way for six years before finally lightening it up earlier this year. We chose a much lighter shade of green and painted three of the walls the lighter color. It brightened the entire room!

In sewing projects, it is much simpler to "try it out" even before buying. I feel like a hoarder when I visit the fabric store because I'll find a print I like and carry it around until I find something to go with it. Sometimes, I end up carrying 5 or 6 bolts around trying to find coordinates. When choosing two or more fabrics for a project, hold them next to each other and see how they look. I often snip a small section off a larger piece of fabric from my stash and take that with me when I go shopping so I can find something to go with it.

Bigger Patterns for Bigger Area

As a general rule, I try to stick to using smaller patterns for smaller areas of a project. Otherwise, it just gets too busy. Using large patterns on small areas can give mixed results. So when you're choosing patterned fabric, try to look at it in terms of what size of cut you'll be using in your project. When selecting the fabric I used to recover our dining chairs, I could only find a print I liked online. It's awesome to buy fabric online because you can find great deals, but pay attention to the scale! Some online fabric stores will always show 1 square foot of the fabric while others show more or less. So make sure you look at the scale and compare it to the intended project.


Here is an example of different scales. Both of these images are from FabricGuru.com. The fabric on the left is what I used to cover our chairs. Without looking at the rulers, you might think the prints are the same, but when you zoom in, you'll find that the print on the right is much larger. When I was trying to decide which fabric to order, I printed out a few sheets of each print, taped them together, and set them on my chair so that I could see how the scale of the print would look with the scale of the chair.

My best advice is to go with your gut, be brave, and go for it! You can usually fix it if it ends up being a mistake.

{Linked on Willamette Valley Wonder Woman, Sunshine and a Summer Breeze, Artsy-Fartsy Mama, Live Laugh Rowe, Rhinestone Beagle, Endlessly Inspired}

Monday, July 29, 2013

DIY T-Shirt Applique

My son will start kindergarten in less than a month! That means I have 4 weeks to get caught up with all my good intentions. I intended to teach him to tie shoes, but instead we got velcro ones. I intended to teach him to tell time, but haven't gotten around to it yet! We have worked on upper & lower case letters, as well as following instructions. I never realized how complicated a color-by-number could be for someone who is not used to following instructions no matter what!

Anyway, one thing that I have wanted to do for a while is embellish some solid color tees for him. I took him school shopping and let him choose a few shirts he liked, but then I also picked up some solid color tees for projects.

This is the first time I have done appliqué and it was not nearly as hard as I thought it would be! I sort-of followed the tutorial found on Sew Mama Sew to appliqué woven fabric onto a knit shirt. It turned out great!


My biggest mistake was cutting out my dinosaurs before ironing it to the fusible web. Don't do it that way unless you want to scrape web off of your ironing board afterward. Iron the fusible web onto the back of the fabric, then cut the shapes out! This way, you can do the fusing without fusing it to your ironing board, and the shapes will be easier to cut without any fraying.

After fusing the shapes to the shirt, I stitched around each shape. I made sure to stitch around the outside of each shape so it wouldn't peel off, then did a few of the details that weren't too small.


Here's my handsome boy modeling the finished product! Despite his protests that dinosaurs are not cool, he still ended up liking it by the time it was finished.

{Linked on Piggy in Polka Dots, I Should Be Mopping, This Gal Cooks, Sumo's Sweet Stuff, All Things Fee, Uncommon Designs, Serendipity & Spice, Craft & Repeat, Be Colorful, Ninth Street Notions, DIY Home Sweet Home, Keeping It Simple, Craft-O-Maniac, Carrie This Home, Endlessly Inspired}

Wednesday, July 17, 2013

Patchwork Skirts

My two-year old daughter, Violet, recently decided that she is a pirate princess (thanks to Jake and the Neverland Pirates). This created a bit of a problem at our house because she only owned one skirt that is not a dress. Several days each week, she refuses to wear pants, but says "No! I want my pirate princess!" So I decided to make a few skirts for her.

For the first one, I used the Zig Zag skirt tutorial from Moda Bake Shop. Since my skirt needed to fit a thin two-year old, I had to modify the measurements. I also didn't want to buy pre-cut fabric since it's more expensive and there's a smaller selection. So I made it up as I went.


I bought my yardage, then cut my squares into my own charm pack. Then I pieced them together as instructed until my skirt looked big enough to fit around my daughter with a little fullness. I followed the rest of the tutorial as written. Here is how it turned out:


I really wanted some different colored skirts for her, so I found some great remnants at Hobby Lobby. This time, I decided to modify the pattern to use squares and rectangles. The concept is basically the same as the zig-zag skirt. Piece your shapes together until it is the right size, then add the waistband and hemline. Instead of simply hemming this one, I added a ruffle around the bottom. Here is how it turned out:

Featuring the pirate princess herself and her magical rainbow wand.
This method is really simple and turns out very cute, so I plan to make at least one more of these skirts for Violet. I just need to restock my elastic supply first.

{Linked on Ashley's Dandelion Wishes, Fluster Buster, Someday Crafts, Daisy Cottage Designs, We Like to Learn as We Go, DIY Crafty Projects, Gingersnap Crafts, Handy Man Crafty Woman, Trendy Treehouse, 52 Mantels, Eclectic Red Barn, Sew Can Do}

Wednesday, June 26, 2013

Hoop Art Round-Up

I have been seeing embroidery hoop art everywhere and I am loving it! I guess I need to dig out my embroidery hoop and get to work creating my own. In the meantime, here is a round-up of some of my favorite hoop art projects:


This piece made by Bev at Flamingo Toes is a classic and beautiful example of how to incorporate traditional embroidery with a more modern flair. I especially love the lace!


This one was made by Nicki at Il Magpie. I love this design and the vibrant colors she chose. I would love to do some free machine appliqué like Nicki did here. I'm just not sure I could do such a nice job of it!


Andrea at Knitty Bitties created this colorful hoop art (and several others). Click through to her post and check them out because they are all fantastic! I love how she pieced the various fabrics together and then incorporated the same fabrics into the bunting.


Bethany at Pitter & Glink provides a simple tutorial on how she made these lovely hoops. This might be a good starting point if you're new to embroidery. And sometimes simpler is better!


I love fabric flowers, so I had to include this beauty from Caroline over at Sew Caroline. I love the piecing, the lace, the flowers with button centers... and at the risk of making it too busy, I would venture to add a bit of lettering across the bottom section. This looks like a great use for some of my scrap stash!


And I think that Bronwyn at Queen B Creative Me wins by providing my absolute favorite hoop art collection! Of course, by including a matryoshka doll, she had pretty good chances of becoming my favorite. Now I want to whip up a similar collection for my daughter's walls.

So which one is your favorite?