My daughter, along with every other small child on the planet, is obsessed with
Frozen. She is particularly smitten with Queen Elsa. It didn't take long for me to get tired of helping her keep a blanket around her shoulders so that she could dance around the house singing "Let It Go." I knew I needed to make her a cape.
I found a great set of instructions from Lara at
You Are My Licorice. Her tutorial helped me figure out how much fabric I needed and then how to assemble the cape. I highly recommend checking out her instructions.
I used her tutorial, but made some changes, so I thought I'd put together my own tutorial.
My daughter insists on having an Elsa coronation dress, so the cape I put together is the purple cape that Elsa wears with her coronation dress before "letting it go" on the north mountain. This cape looks a lot like Anna's cape as well.
Now for the tutorial:
Materials Needed for 4T:
- Approx. 1 Yard Purple Satin (Mine is from Joann and I just happened to find a remnant in the exact color I needed!)
- 1/8 Yard Dark Purple Satin (for trim around the capelet)
- Matching or contrasting thread
- Sew-on velcro
- Decorative gem
Step 1: Cut the Cape & Hem
Measure your kid from the shoulders to where you want the hem to fall. My daughter is tall, so my measurement was 33 inches. Add 2 inches for seam allowances.
Fold your orchid satin long-ways, right sides together. Use chalk to mark where you'll be cutting the bottom edge of the cape.
Tip: Pin your layers together before you cut or it will slide around a lot. I didn't do this for the first step and regretted it!
Cut along your line. Then, you'll hem up the sides and bottom edges of the cape.
Step 2: Cut the Capelet
For the capelet (the small cape around the shoulders), repeat the above steps. See
Lara's tutorial to see the shape for this part.
Step 3: Add Trim to Capelet
Once your capelet is cut out, you're going to add the trim to it. Take your 1/8 yard of dark purple satin and pin it to the longest edge of the capelet, right sides together.
Stitch them together using a straight stitch, then turn it and press flat.
Tip: To press satin, make sure you use a pressing cloth and a dry iron so that you don't burn the fabric.
Step 4: Hem the Capelet
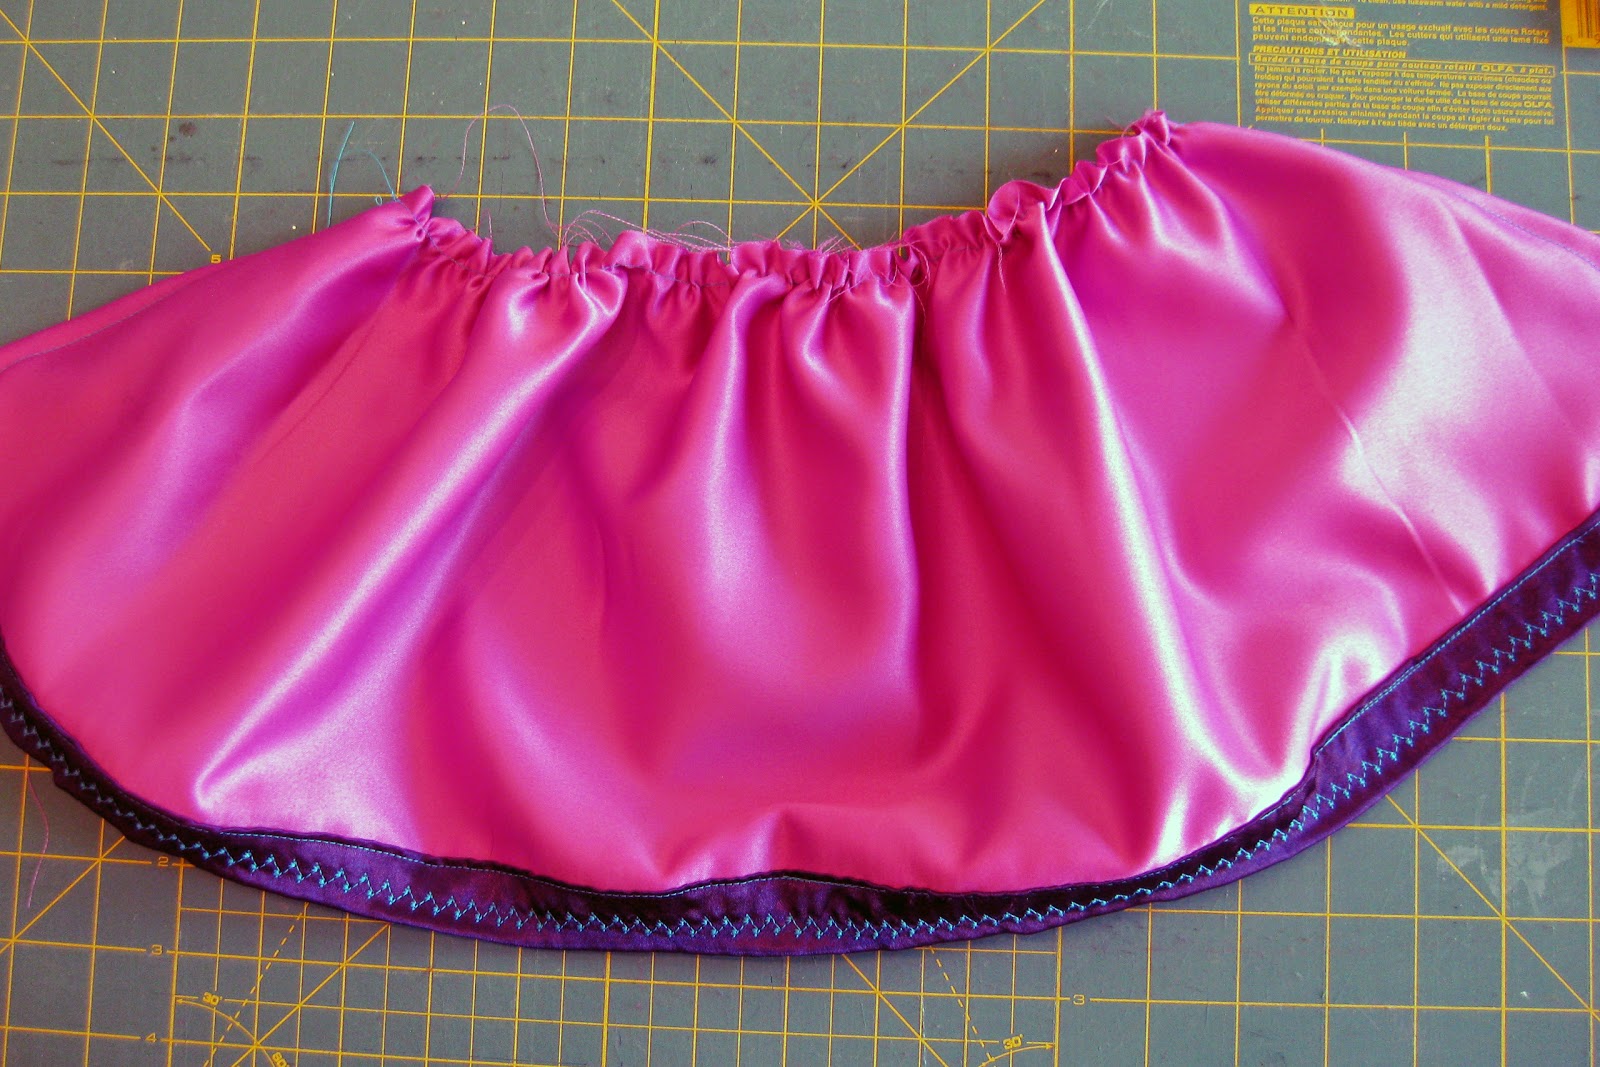
Trim the dark purple down to about 1.5 inches wide. Then, you'll roll the dark purple up and pin it in place so that you can hem it. This will enclose the raw edges.
Straight stitch to hem. Then, fold the sides in and hem them. Finally, go back and add another row of stitching to the trim to flatten it out. I used a decorative stitch down the middle of my dark purple strip.
Step 5: Gather the Top of the Capelet & Cape
Sew a long basting stitch along the top edge of your capelet, then gather it up. You'll do the same thing to the top edge of the cape.
Step 6: Attach the Capelet to the Cape
Lay your cape out, then place the capelet on top of it, lining up the gathered edges. For this part, you'll put the cape dull-side up and the capelet on top of it, also dull-side up. Pin the pieces together, lining up the side edges.
Straight stitch the layers together, then flip the capelet to the right side of the cape.
Step 7: Finish It Up!
With your capelet on the right side of the cape, sew a straight line about 1/2 inch from the seam at the top. This will enclose the rough edges between the cape and capelet.
Attach sew-on velcro at the corners.
Add a gem to the front side of one of the corners.
Then let Queen Elsa be free!
{Linked on
Daisy Cottage Designs,
Serendipity & Spice,
Project Run & Play,
Huckleberry Love,
Carrie This Home,
Sew Can Do,
Uncommon Designs,
I Should Be Mopping the Floor,
My Pinterventures,
Pursuit of a Functional Home,
Fluster Buster,
Pig & Dac,
Ginger Snap Crafts,
Chaos & Kiddos}