Showing posts with label Paper Crafts. Show all posts

Friday, September 5, 2014

The Emperor's New Clothes Craft

As mentioned in my last post, I am in charge of "Fairy Tale Friday" in my son's first grade class today. For this activity, I was told to choose a fairy tale to read to the class, then come up with a craft project for the kids to do to help them re-tell the story. Here is what I came up with:


I found a basic boy paper doll template online through a Google search. I printed him out the size I wanted, placed a sheet of tracing paper on top, and traced around where his shirt and pants would go. I scanned the tracing and printed many copies (enough for each kid in the class to have 2) on card stock. After cutting out all the paper clothes, I gave my fingers a rest for a while.

Then, I started cutting clothing shapes out of fabric scraps. I used every type and print of fabric I had on hand so that the kids would have plenty of variety. I traced shirts and pants, then cut them in half so the kids can mix-and-match their patterns. Then, my prep work was done!

For the actual craft, the kids will be able to choose their fabrics to create outfits for the Emperor. This is why I used card stock clothing as well, so the Emperor can have a change of clothes. The kids will glue the fabric onto the card stock shapes so that as they re-tell the story, they can change the Emperor's clothes (or leave them off as the story requires).


You could also use clear plastic to create an "invisible" outfit, but I didn't have any on hand, so I skipped that part.

{Linked on Happy and Blessed Home, Truly Lovely Blog, Sincerely Paula, The Jenny Evolution, Love Bakes Good Cakes, One Project Closer}

Wednesday, September 3, 2014

What I'm Working on Wednesday

It seems I've taken a bit of a blogging break -- quite unintentionally. I have been keeping quite busy, but not finishing anything worth blogging about! Today, I have several projects in progress:

Embroidery

I'm currently working on some custom embroidery for a Christmas stocking order for my shop. I do all my embroidery by hand, so it is time consuming, but I love the way it turns out.


Fairy Tale Craft

I am in charge of this week's Fairy Tale Friday in my son's first grade class. I'm doing The Emperor's New Clothes and I'm cutting all the pieces they'll need to create some new outfits for the Emperor. I'm planning a more detailed post about this in the near future.


Days for Girls

In preparation for my upcoming Days for Girls Sewing Day, I am cutting as many pieces as I can. If you're interested in finding out more about my Sewing Day, check out this post. If you want to know more about Days for Girls, check out their website.


Reading

And of course, I'm always reading whenever I find (or make) a spare moment. I just finished up The Darkening Field by William Ryan. This week's selection is Rules of Civility by Amor Towles. Another book review post will be coming next week!


What are you working on this week?

Sunday, May 4, 2014

Mother's Day Printable Round-Up

In honor of Mother's Day this week, I thought I'd share some free printables! Enjoy!

Free printable card designed by me! - in Purple, Pink, and Yellow

Click the image to be taken to the source.

Bookmarks by The 36th Avenue

Doodle Card by Mandy Ford

Printable Fill-in Forms by Thirty Handmade Days

Fox Card by We Love To Illustrate

Frame-able Print by 6th Street Design School

Floral Card by Picnics Under the Moon

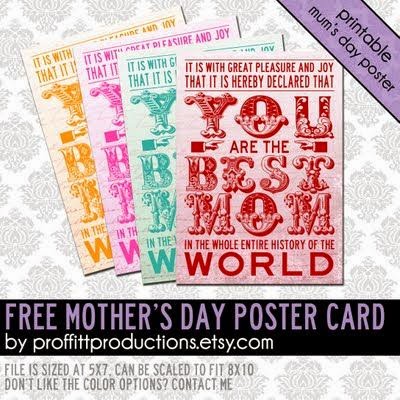
Poster Card by Proffitt Productions

Rock My Socks Card by Sissy Print

Sunday, April 20, 2014

Enchanted Leaves & Paper Gift Boxes

I love browsing Etsy to find new shops to follow. One of my absolute favorite shops is Enchanted Leaves. Find their Etsy shop here or view their website here. Since I had the opportunity to order a couple of gifts from them recently, I wanted to give them a little love by sharing my thoughts here!

The first thing that I found from Enchanted Leaves that I fell in love with is their Lord of the Rings "geekery." If you're looking for a gift idea for me, here it is! They have jewelry celebrating many different books, movies, and shows, including The Hunger Games, Arrested Development, and Harry Potter. If you're looking for a unique gift, this is a great place to start. Who doesn't want a Bluth banana necklace or Dirigible Plum earrings?

My absolute favorite: Hobbit Door Locket
Another favorite: Twilight Chess Piece Necklace
Of course, the geekery just reeled me in. I couldn't stop myself from exploring the rest of the site. They also have some beautiful items "inspired by the land, sky, and sea."

Cherry Blossom Necklace
Brass Owl Earrings
Saffron and Copper Acorn Necklace
I've been waiting for an reason to order something from Enchanted Leaves. The opportunity finally came and I was so excited to get gifts for my Mom and Grandma for Mother's Day (don't worry... they already got their necklaces, so I'm not spoiling their surprise).


My great-grandparents, then my grandparents, ran an orchard in eastern Utah. My Grandma grew up there and my Mom grew up there. I spent many weekends of my childhood and teenage years there, sorting apples and thinning peaches. So when I saw these beautiful apple necklaces, I knew it would be the perfect gift for my Mom and Grandma. 

My items arrived very quickly and they are beautiful and very well made! They came individually packed inside a tiny tarnish-proof plastic bag inside a larger tulle bag, along with instructions on how to care for the jewelry.

Since I wasn't able to deliver the necklaces personally (but had to send them with my brother), I decided to make some card stock boxes for each of them to keep them safe. I used a template I found on Easy Paper Crafts to make this 6-sided box. I used Stampin' Up card stock to make them pretty and feminine.


The flowers on top were made using a tutorial found on Whimsical World of Laura Bird.


Tuesday, January 21, 2014

Playing With Books

I know it's been nearly a month since Christmas, but I finally have some time to get back to blogging and wanted to share one of the best gifts I've ever gotten:

Playing With Books: The Art of Upcycling, Deconstructing, and Reimagining the Book
by Jason Thompson

My hubby got me this book all about fun things to do with books! I'll be honest... I'm a little bit tempted to created a dress for myself out of book pages, though it wouldn't be terribly practical. This book is filled with amazing ideas and instructions. Now I just need to go on the prowl for some good old books with sturdy covers so that I can get started.

Monday, October 28, 2013

"We Can't Play" Door Hanger (with free printable)

My son is five and until this year, we haven't had much of an issue with neighbor kids knocking on our door. But this year, the knocking has become incessant. In an effort to lessen the dinner-time and homework-time interruptions, I decided to make a sign for the front door. Here is how it turned out:


I still plan to laminate it so that it can survive some harsher weather, but I'm quite pleased at how it turned out. The true test will be the first time I hang it on the front door.

If you like it, download and print your own! Click the image below to go to the free download. The print is 8x10 and you can customize by printing on any color of card stock you like (but please note that subtle patterns work better than multicolored patterns).

Click the image for the free printable!

Tuesday, October 22, 2013

Decoupage Pumpkin

There are so many great pumpkin decorating ideas out there these days, but I could not resist an opportunity to decoupage book pages onto mine. Here's a quick step-by-step on how I created this beauty


Step 1: Clean your pumpkin thoroughly.

Step 2: Rip up your book or magazine pages so they are in strips and small pieces.

Step 3: Using Mod Podge, coat one section of the pumpkin at a time and apply the pages, smoothing them down and making sure the edges adhere to the pumpkin. Layer the pages until the entire pumpkin is covered.

Step 4: Find some cute embellishments! My polka dots came from some Stampin' Up cardstock that had velvety black dots. I cut them out and then used Mod Podge to adhere them to the book pages. Since cardstock is stiff, I applied the Mod Podge, stuck the dot on, then pressed it down for a minute so that it would shape itself to the surface.

Step 5: Decorate that stem. Using a simple bow tutorial found online here, I tied a double ribbon bow and added some orange and green curls. I hot glued all the ribbons in place.

And there you have it! Since I used Harry Potter pages to cover my pumpkin, I thought the best place to display it would be among my Harry Potter books.

{Linked on Coastal Charm, The DIY Dreamer, Ladybug Blessings, VMG206, Our Delightful Home, Funky Polkadot Giraffe, Hope Studios, My Uncommon Slice of Suburbia, New Nostalgia, And Sew We Craft}

Tuesday, September 17, 2013

Trendy Tuesday - A Hexilicious Round-Up

I have been seeing hexies everywhere these days and now I am thinking of trying it out myself. Now, I am not a very experienced quilter, but I've found tutorials on how to piece hexes, so I will be giving it a whirl.

In the meantime, here is a round-up of my favorite hexie projects that I have seen so far:


**Please don't pin these images from my blog, but click through and pin from the original source!**

The "Hexcellent Headband" by Michele Made Me
The "Hexy Clock Ikea Hack" by Sew Fearless
"Hexagon Picture Frame" by Landee See Landee Do

"Scattered Hexagon Pillow" by Jacks & Kate 
"Quilted Hexie Stocking" by Simplify
"DIY Instagram Hexagon Frame" by Oleander And Palm

Wednesday, September 4, 2013

Simple Preschool Name Magnets

At my church, I help out with the 2-year old kids. As you can imagine, this can get a little crazy. We have a great organization and stick to a tight schedule so that the kids (and adults) can make it through two hours incident free.


This project came about to serve several purposes. First, these name magnets help the adults know which kids are there each Sunday and remember their names. Second, the magnets hold the childrens' coloring pages until they go home. And third, they help jazz up an otherwise boring and generic classroom.

The great thing is that this project is one that even slightly older kids could do themselves! Here is a simple tutorial:


For the project, all you need is craft foam (from the dollar store), school glue, scissors, and a pen or marker.


Decide what shapes you want on your magnet and cut them out. I decided to do an animal that corresponds with each letters (as in J for jackrabbit). For some of the more complicated animals, I found a simple online tutorial to help me draw a recognizable animal.


Then, paste your shapes onto the background. School glue will adhere well once it dries. While it is wet, the foam is extremely slippery! So try to position everything and then leave it alone until it dries.


Then I colored the outside edge of the shapes (and the details on the animal) with a marker to make them stand out and wrote the child's name on the background. Attach a magnet to the back and you're done!

{Linked on Embracing Change, Sensational Creations, Live Laugh Rowe, I Gotta Create, 7Alive, 52 Mantels, The 36th Avenue, Joyful Homemaking, The Crafty Blog Stalker}

Saturday, July 27, 2013

Washi Tape Bookmarks

This was a super easy and super fast project that anyone can do! I made several different designs, just trying different things and different paper/tape combos. Here's a quick how-to:


Cut

Cut a piece of card stock 2x6 inches out of the color of your choice.

Tape

Create your washi tape design. I tried taping vertically (on the burgandy scallopped one), diagonally (on the green and copper one), horizontally (on the notched one), and both vertically & horizontally (on the chalkboard one).


Punch

Once your taping is complete, punch a hole in the center of one end. Thread a ribbon through and tie off as you like.

Trim

Trim corners and edges to add more interest if you like. Of course, you don't have to. My favorite of the ones I made is the one I didn't trim at all.


Please link up your washi tape projects in the comments because I would love to see your ideas as well!

{Linked on Tatertots & Jello, Be Different...Act Normal, One Artsy Mama, Truly Lovely, Happy and Blessed Home, The Stitchin' Mommy, The Wondering Brain, A Little Claireification, Sincerely Paula, Carrie This Home}

Sunday, April 28, 2013

Silent Sunday Inspiration Board

Since I have been dealing with sick kids all week, I haven't had tons of crafting time. I have been too busy doing 7 loads of laundry in one day or sanitizing door knobs and light switches or deodorizing the house. Now that my miserable boy is asleep, I thought I would post some DIY projects I have come upon recently that I love.

Cross Stitch Chair
from My Poppet


 A Book For Dad


Arrested Development Hoop Art


Skeleton Party Invitations


Patchwork Pots

Tuesday, April 16, 2013

Covered Canvas, Take #2

Last week, I posted a tutorial on how to cover canvas with paper and add fabric embellishments. As admitted in that post, my Harry Potter covered canvas didn't turn out quite as well as I had hoped, but I learned from it and whipped up a new one, which I like much better this time.

Check it out:


This time, I used pages from Jane Austen's Sense and Sensibility. The quote is one said by Mrs. Dashwood to Edward Farrars... “Know your own happiness. You want nothing but patience- or give it a more fascinating name, call it hope.”

I used a stencil to create the flower graphic. I like how it turned out to have the text peeking through the flowers.

I love the size of the words and flowers in relation to the canvas. The script font was much easier to line up and place than it was to do each letter individually. My biggest problem with this one came from choosing black/white/gray fabric, so the words didn't not stand out as much as I wanted them to. So I ended up coloring the edges black to make them pop a little more. Next time, I'll use colored fabric for the words. Overall, I feel it was a success and I plan to find a place to hang this one in my craft cave.

{Linked to: Cedar Hill Ranch, Craft-O-Maniac, Coastal Charm, Lil' Luna, Someday Crafts, Sew Much Ado, and Somewhat Simple}

Thursday, April 11, 2013

Covered Canvas Tutorial


I came across an idea from Rachel at Always a Project that I instantly LOVED. She took canvases, covered them with book pages, then placed a fabric shape over the top of it to create a beautiful and unique wall decoration for her sewing room. Every time I look at her covered canvases, I am in awe at how fabulous they turned out.

So I decided to give it a try, with my own spin on it.

First, I gathered up some supplies:

8x10 art canvas
Old copy of Harry Potter and the Sorcerer's Stone
X-Acto knife
Ruler
Fabric
Mod Podge
Cardstock

Step 1 - Cut pages out of the book. Depending on how you'd like the result to look, you can either tear them for a jagged edge, or use the X-Acto and ruler to make a clean, straight cut. I went with a straight cut on mine, but I'd like to try a jagged look next time around.


Step 2 - Attach pages to canvas using a thin layer of Mod Podge. You can do all the pages the same direction or alternate them. I alternated mine.


Step 3 - Transfer your shape to back of fabric. For this first try, I went with a simple lightning bolt. I like how Rachel's looks better with the larger shapes that cover the majority of the canvas. Decide how large you want your shape, print it, then trace it onto the back of your fabric and cut it out.


TIP: Smaller shapes will fall apart. Reinforce your fabric with interfacing or by attaching it to card stock before cutting (see the next step).


Step 4 - I also wanted words from the page cut out of fabric on my canvas. So I chose my quote, laid it out in Illustrator, reflected it, and printed it on card stock. I used Mod Podge to attach my fabric to the opposite side of the card stock, then used the X-Acto to cut around the letters. You'll be cutting out backward letters, but when you turn them over, you'll have fabulous fabric letters that won't fall apart!


Step 5 - Then use more Mod Podge to attach all your fabric shapes to the canvas. Seal your book pages with more Mod Podge in an even coat over the top and edges. And you're done!


For a first try, mine turned out fine, but there are several things I would change. Because I'm sure you're dying to know, here they are:
  • Make the fabric shape larger.
  • Trim white edges off book pages for a more solid text look.
  • Plan out fabric placement on canvas better (because I ended up with extra space at the bottom)
(Linked at Seven Alive)