I have a little bit of quilting experience, but nothing too extensive. I tied a couple of quilts as a teenager and sewed a couple of baby quilts as an adult. But I've never pieced a quilt. Until now, that is.
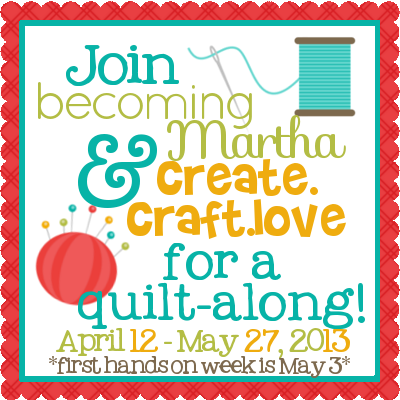
I have joined the "Quilt Along" organized by Jill from Create.Craft.Love. and Sarah from Becoming Martha. This way, I won't have to figure it out on my own! The quilt we will be making will end up looking something like this:
Of course, I'll choose my own fabrics. Since it is a twin size, I intend to make this for when Violet moves up to a big girl bed sometime in the next year. The Quilt Along starts on Friday! Who wants to learn to quilt with me? You know you want to, so click the link and sign up!
Tuesday, April 9, 2013
Rainy Days & Mondays
Here in Utah, we don't get much rain. Today was the exception. It rained for the entire day. And even though I love a good Carpenter's song, rainy days really don't get me down. Days like today give me a very good excuse to hang out inside all day, working on projects that I have put off... like scrubbing the bathroom floor... or testing out my new steamer on our upholstery... or finishing another wreath. Today, I did all of this and more!
I put my recently stitched ribbon flowers to good use, embellishing the newest wreath to enter my shop: The Denim Scallop.
I've seen a lot of scallop detail being added to crafts recently and I love the richness and texture it adds to this wreath. And I can't get enough of these ruffly ribbon flowers. They make me smile every time I see them!
(Linking to Sugar Bee Crafts, Keeping It Simple, TwelveOEight, and Cedar Hill Ranch)
I put my recently stitched ribbon flowers to good use, embellishing the newest wreath to enter my shop: The Denim Scallop.
I've seen a lot of scallop detail being added to crafts recently and I love the richness and texture it adds to this wreath. And I can't get enough of these ruffly ribbon flowers. They make me smile every time I see them!
(Linking to Sugar Bee Crafts, Keeping It Simple, TwelveOEight, and Cedar Hill Ranch)
Labels:
Embellishments
,
Fabric
,
Wreaths
Saturday, April 6, 2013
I'm Spending My Weekend...
...making ribbon flowers and watching LDS General Conference. That's right, folks, I'm a Mormon. And for Mormons everywhere, this weekend is a special one. We get to hear the words of the living prophet right in our own homes.
Of course, having small children makes listening to these words somewhat difficult. But we try our best. While we watched this morning's session, the kids drew pictures, played iPad games, and drove everyone crazy. And even though all the craziness made it difficult to hear, it was important to my husband and I that we had the TV on so that our kids could see Conference and in the hopes that maybe we'd be able to hear at least part of it.
While I attempt to listen, I try to be productive, too. Today I am sewing ruffly ribbon flowers to add to all my crafting projects. These flowers are super easy to do. Here's a little walk-through:
- Cut a few inches of ribbon (the longer your ribbon, the more ruffly your flower will end up).
- With a needle and thread, sew along one edge of the ribbon.
- When you get to the end, hold the thread tight and pull the ribbon down the thread (toward your knot) as far as you can. It will curl itself.
- Straighten it into a circle, then sew a stitch through both ends of the ribbon to join them. Tie it off.
There you have it. Yeah, I told you it was easy. I have been using different widths of ribbon to make different sizes, then stacking two or three on top of each other, sewing them together, then adding a cute pearl or rhinestone center to finish them off.
The best part: at the rate I'm going, I'll have 50+ flowers by the time General Conference ends tomorrow!
How are you spending your weekend?
(Linked on Sew Many Ways, Sumo's Sweet Stuff, Skip To My Lou, and Classy Clutter)
Labels:
Embellishments
,
Flowers
,
Sewing
Thursday, April 4, 2013
The Pin Board
I have been working on several new ideas of items to add variety to my shop. I decided to give pin boards a shot and whipped one up today. It was fun to make and it's so cute I might need to add one to my craft cave wall.
Unfortunately, I didn't take photos of the process, but it was pretty simple to make. You can buy cork in all different sizes at the craft store. Choose your size and shape, cut it out, then you're ready to go!
For this one, I pieced together three different fabrics. Insider Tip #1: Make sure you cut straight lines... or at least fairly straight. Next time I make one, I will be using my rotary cutter. Straight lines make the sewing much easier.
Sew the fabric pieces together, iron your seams, then do a nice top-stitch on either side of each seam. I like how nicely finished this makes it look. Insider Tip #2: Make sure you sew enough pieces together to cover your cork and wrap part of the way around to the back. Otherwise, you'll be like me, going back and forth between the sewing machine and the iron until it fits. Save yourself the trouble and do all the sewing first.
Insider Tip #3: The fabric glued to the back of the cork will cause some bulging. To alleviate this, I simply added a circle of card stock to smooth the surface. Then, I attached a solid piece of fabric to the back, gluing carefully on the edges of the cork. Trim it neatly and make sure you don't have any stray threads coming out on the front of your board. Then, cover your edges with a coordinating ribbon! This hides the edges of your fabric and gives the whole project a nicely finished look.
Of course, you can add any embellishments you like. I simply added some coordinating covered tacks, a stick-on hook is securely glued to the back, and this pin board is ready to pin!
(Linked on Seven Alive)
Monday, April 1, 2013
Some Wonderful Mystery
I spent Easter weekend visiting my in-laws. During some of the quieter moments, I worked on my newest edition of "Stitched Lit." I'm still finishing it up before posting it in my shop. Here is a preview of the embroidery:
Who can guess the book?
(Linked on Skip to My Lou, I Should Be Mopping, and Sew Many Ways)
Labels:
Embroidery
,
Literature
,
Stitched Lit
Subscribe to:
Posts
(
Atom
)