Tuesday, April 30, 2013

Birthday Party Ideas for Boys

My son is turning five this week, which means a birthday party plan is in the works. In honor of his birthday, I've compiled this round-up of great birthday party ideas for boys. Enjoy!

Sharks vs. Superheroes

This was Eddie's birthday party last year. He couldn't choose between the two, so we combined two themes into one. The kids painted with Kool-aid and ice cubes, which was a big hit. We had shark balloons in a kiddie pool they were supposed to sit on to pop (tip: get cheap balloons or little kids won't be able to pop them!). For the favors, I made each kid a felt super hero mask and we provided cans of shark repellent (silly string).


 Robots

Eddie went through a robot phase earlier this year, so I started collecting ideas for a robot party just in case. We did build our own robot out of things we had around the house for his Valentine box, which turned out great. PBS Kids has a great tutorial on making Tin Can Robots, which could be a fun activity for a party with a couple of adults manning the hot glue guns. You can find a lot of cute robot cakes on Pinterest, but my favorite was this one from Cakes by Becky.


Skeletons

This is the theme that Eddie chose for this year. Skeletons are a little hard to find in May, but luckily we're not having a big party this year. I love this 3-D skeleton cake pan from Wilton. I plan to do a similar cake, but not 3-D, just using a rectangular pan and cutting the cake into coffin shape. If you have enough people at your party to form teams, the Mr. Bones Relay Race could be a fun and easy game to put together. I might make one or two anyway because Eddie loves skeletons (he's a self-proclaimed skeleton expert), so I'm sure they would be well used at our house.


{Linked on My Uncommon Slice of Suburbia, Today's Creative Blog, Cedar Hill Ranch, Someday Crafts, The Trendy Treehouse, The Jenny EvolutionCoastal Charm, Mom on Time Out}

Sunday, April 28, 2013

Silent Sunday Inspiration Board

Since I have been dealing with sick kids all week, I haven't had tons of crafting time. I have been too busy doing 7 loads of laundry in one day or sanitizing door knobs and light switches or deodorizing the house. Now that my miserable boy is asleep, I thought I would post some DIY projects I have come upon recently that I love.

Cross Stitch Chair
from My Poppet


 A Book For Dad


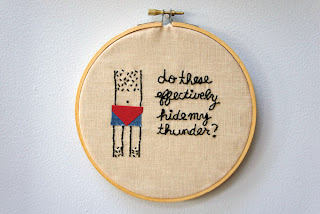
Arrested Development Hoop Art


Skeleton Party Invitations


Patchwork Pots

Saturday, April 27, 2013

Mother's Day Sale!

I am hosting a Mother's Day Sale in my Etsy shop! Come visit from now until May 11 and get $5 off a $15 purchase. I will be unveiling several new summertime wreaths in the next couple of days.

Thursday, April 25, 2013

Thinking Thursday #1 -or- Great Reads for Older Kids

I have always loved reading. I was that kid who would turn the lights back on after my parents thought I was asleep so that I could keep reading. I was that kid who would wake up in the middle of the night with the lights on and a book on my face. I was that kid who read Moby Dick in junior high just because I wanted to (and I hated it, but that's beside the point).

I am still a ravenous reader. I am generally reading two or three books at a time, or if I'm really into them, I can read two or three books a week. So it was only natural that I would start a book club when I needed some more social interaction.

The book club started out reading kids books (middle reader through young adult). I chose this age group mainly so that we wouldn't have to worry too much about adult content, but also because there are a lot of great kid books out there.

So for my first edition of "Thinking Thursday," I present some great reads for older kids. Enjoy!

Classics

Peter Pan by J.M. Barrie

Surprisingly, Peter Pan led to the best book club discussion so far. We're all familiar with the Disney version of the story, so it was interesting to read the original and to see that it is not so innocent as we thought. My favorite moment from our group's discussion was when another book clubber gasped, "Wait! Peter Pan is not real?!" I hate to spoil it for you if you haven't read it, but no, Peter Pan is not real.


A Little Princess by Frances Hodgson Burnett

You might be hard-pressed to get a boy to read this book after seeing the title, but it is a wonderful book for any child. Granted, Sarah is a little too perfect, perhaps, but I think that reading about her struggles can help children to feel empathy and to see that goodness is generally rewarded in the end. It could also work to teach your kids that not all adults are trustworthy.


Science Fiction

Ender's Game by Orson Scott Card

Probably better for older readers (junior high or high school), Ender's Game is a superbly written book. Not only does it spark the imagination with its descriptions of our world and technology in the future, but it makes the reader think about right and wrong. Is the end a justification for the means we use to get there?


The Giver by Lois Lowry

Another dystopian future awaits a reader in this thought-provoking book. This could lead to some great discussions with older kids about why it is important to remember the past and learn from it... as well as the importance of having hope.


{Linked on The Girl Creative}

Tuesday, April 23, 2013

Magnetic Frames

Usually when I have time to spend on crafts, I use it to make new wreaths for my shop. Today, however, I decided to work on a project that I started a month ago: a magnetic frame. I actually plan to have three of these that coordinate, but so far, I only have the first finished.


This is made using a small plastic frame from the dollar store. My frame is approximately 3 x 2.25 inches. I removed the frame stand from the back of the frame so that I could attach the magnet. I removed the glass. I originally planned to put the glass back into the frame after it was wrapped, but the fabric added just enough bulk that I couldn't get the glass to fit. So actually, I broke the glass trying to force it back into the frame. Oops.

I cut my fabric into thin strips (1/2 inch wide) and used those strips to cover the frame. I added a small twist rose to one corner as well. The embroidery is done on solid gray to coordinate with the frame itself.

I have two more frames that are already covered in fabric, but I still need to do the embroidery. When I finish, I'll post the trio all together.

Monday, April 22, 2013

Mother's Day Idea Round-Up

Mother's Day is right around the corner and if you're like me, you're always looking for great DIY gift ideas. So today I've compiled a round-up of some of the homemade gifts that I love (one of which I am making for my mom, but I can't tell you which just in case she see the post).

Travel Journal

My parents are really in to traveling and my mom always needs to have her next vacation planned. So what better gift could there be than a homemade travel journal (like this one from Sew Useful Designs)? Plus it would give Mom a nice place to collect brochures and ticket stubs and also record memories or fun stories about each trip.


DIY Lighthouse Garden Decor

My mom loves lighthouses and has several displayed on the pot shelf in her house. So as soon as I saw this idea from Completely Coastal, I thought of her. Unfortunately, my parents haven't finished their yard yet, so I'm not sure she would have a place for something like this. Maybe when they do finally have a yard, I will have to try this out.


Magnetic Photo Display

Every grandmother needs ample space to display photos of her grandkids. I especially liked this idea from Plum Pudding: use wooden alphabet blocks as magnetic photo holders.


Hug Pillow

This "hug pillow"found on From An Igloo is a wonderful way to have the kids help create a gift for Grandma. Plus it can act as a conversation piece for the grandparents to brag about the grandkids.


Sunday, April 21, 2013

My Greatest Hits

I haven't completed many projects this week, but I thought I'd share some of my pre-blog projects that I loved. Enjoy!

Sewing


Last year for Christmas, I made aprons for my nieces using a tutorial found on Tidbits. They turned out so cute and I have big plans to make one for Violet as well... as soon as I have a lull in my crafty project load. That might be never.


Inspired by my sister-in-law, I made hooded towels for both of our kids for Christmas as well. I added a strip of patterned fabric to make them a bit more fun. Hooded towels are a must-have with little kids.

Home Decor
One of the best ideas I ever had is one I don't have a photo of. Before Eddie was born, I had the brilliant idea to put a dimmer switch in his room. Our kids' bedrooms are ridiculously small, so we didn't have a place for a lamp. The dimmer switch has been a lifesaver -- during midnight nursing sessions, night terrors, and the current "afraid of the dark" phase.


The second greatest idea I ever had resulted in this wall display. We got these collage frames from Target and originally just had one. But when we wanted to display our family photos in our living room, we needed something more substantial to fill the space. So I bought a second collage frame, then carefully cut the circles apart. I love the "floating bubble" effect.

Costumes


A couple of months before Eddie's 2nd Halloween, we read Where the Wild Things Are every day at least once. It was his favorite book, so we thought it would be very fitting to make Eddie a wolf suit so he could be Max for Halloween. This was my first attempt at sewing anything so complicated, so I modified an Eeyore pattern, adding buttons down the front, and totally improvising on the hat. It turned out surprisingly cute all things considered. Plus it gave me more confidence so I would dare to keep trying to make our kids' costumes. 


Violet went through a Little Mermaid phase where she would sing like Ariel all the time. This costume took a lot more creativity on my part. Luckily, I found the perfect fabrics at JoAnn. For the tail, I cut the fabric into a tail shape (one for the front and one for the back) and made the tail more like a skirt so that she would still be able to walk. Violet doesn't take small steps either... she really struts around. So I had to make the slit pretty high to accommodate. The tail has an elastic waist. For the top, I basically made a ruffle fabric onesie. I cut the ruffle fabric into onesie shape, sewing the crotch and sides. Then I added little fluttery sleeves and embellished with some sparkly ribbon. Ruffle fabric is already really stretchy, so I didn't have to worry about it fitting too well. A little dollar bin plastic jewelry finished it off.


Embroidery


Years ago, my brother moved into an apartment on his own. Once he didn't have roommates, he felt he could decorate as he wished and he requested a sign that said "Don't let the door hit you where the good Lord split you." I decided that if I was going to create such a sign, I should make it as gaudy as possible. So naturally I opted for an Old English style embroidery. Then Dave used his artistic skills to create the graphic, which I embroidered as well. The frame is just the icing on the cake.


After Violet was born, we decided we needed matching Christmas stockings, so I made them. I combined two different tutorials (FabricWorm & Prudent Baby). I embroidered our names onto the cuffs and they turned out beautifully.

{Linked on Sumo's Sweet Stuff, I Should Be Mopping, Keeping It Simple, Rain on a Tin RoofCraft-o-Maniac, Today's Creative Blog, Sugar & Dots, Made In A Day}

Saturday, April 20, 2013

Quilt Along Fabric

As I've mentioned in a previous post, I am participating in a Quilt Along organized by Jill from Create.Craft.Love. and Sarah from Becoming Martha. The actual quilting has not started yet, so if you are interested in joining, now is the time. Click here to learn more:

Quilt-Along

We've spent this week gathering our supplies, including what may be the best part: choosing fabric! I love fabric shopping more than any other kind of shopping (unless you count dessert shopping). So I was pretty excited to find the perfect fabric to make a quilt to coordinate with Violet's current room, but not be too babyish for her to use for years. I chose purple as the main color because the wooden letters hanging on her wall are done in purple. I also wanted non-girl specific colors included, which is why I chose green and orange as my secondary colors. There's also yellow and blue in the mix on the patterned pieces, so hopefully it will not end up too purple-y for Violet (who seems to prefer pink these days -- a fact I chose to ignore when making my selections).

Without further ado, here is the fabric I selected:


I chose Riley Blake's Dress Up Days collection in purple and orange. The back of the quilt will be solid grape, it will have solid green stripes, and a bit of orange mixed in. I am so excited to see how it turns out!

Thursday, April 18, 2013

Bubbly Wreath

I'm always brainstorming new ideas for my line of fabric wrapped wreaths. I thought this one was a rare stroke of genius: bubbles! Being the mother of two preschoolers, we spend much of our outdoor time blowing bubbles. So what better way to celebrate summer than to adorn your front door with bubbles!

Of course, I ran into the logistics of making bubbles that could be attached to a wreath. For this first one, I used small wooden beads, painted white and light blue with blue glitter. I interspersed these "bubbles" among the flowers and I love the result.


I plan to do another using different sizes of "bubbles" and maybe if I'm feeling really saucy, I'll add a bubble wand.

Got any other ideas on how to put bubbles on a wreath? Please comment! I'm always looking for new ideas.

You can find this wreath (and many others) in my Etsy shop.

{Linked on One Artsy Mama, Wait Til Your Father Gets Home, Be Different...Act NormalThe Pink Momma, and The Wondering Brain}

Wednesday, April 17, 2013

Apron Round-Up


I will be the first to admit that I don't cook very much. I am fortunate to have a husband who enjoys cooking and is fine shouldering most of that responsibility. However, there are times when I feel compelled to whip something up in the kitchen (usually involving chocolate), so I feel like I really ought to own an apron. After all, I am the one who does the laundry, and spraying all those tiny grease stains with OxyClean is a bit of a pain sometimes.

So today I am presenting you with a round-up of some great DIY aprons I have found as I've tried to decide what to make for myself. Feel free to link up any I missed in the comments because I would love to see them!

Levi Apron from A Girl & A Glue Gun


Patchwork Apron from Lark Crafts


Pleated Apron from Sew4Home


Ruched Apron from The 36th Avenue


No Seams Exposed Apron from Stitches in Play


Which is your favorite?

{Linked on Mom On Time Out and Seven Alive}

Tuesday, April 16, 2013

Covered Canvas, Take #2

Last week, I posted a tutorial on how to cover canvas with paper and add fabric embellishments. As admitted in that post, my Harry Potter covered canvas didn't turn out quite as well as I had hoped, but I learned from it and whipped up a new one, which I like much better this time.

Check it out:


This time, I used pages from Jane Austen's Sense and Sensibility. The quote is one said by Mrs. Dashwood to Edward Farrars... “Know your own happiness. You want nothing but patience- or give it a more fascinating name, call it hope.”

I used a stencil to create the flower graphic. I like how it turned out to have the text peeking through the flowers.

I love the size of the words and flowers in relation to the canvas. The script font was much easier to line up and place than it was to do each letter individually. My biggest problem with this one came from choosing black/white/gray fabric, so the words didn't not stand out as much as I wanted them to. So I ended up coloring the edges black to make them pop a little more. Next time, I'll use colored fabric for the words. Overall, I feel it was a success and I plan to find a place to hang this one in my craft cave.

{Linked to: Cedar Hill Ranch, Craft-O-Maniac, Coastal Charm, Lil' Luna, Someday Crafts, Sew Much Ado, and Somewhat Simple}

Monday, April 15, 2013

DIY Banquette Seating


Our house is small and we are constantly looking for ways to incorporate storage into every possible space. We already built shelves into our garage, turned the storage closet into a craft room, and got rid of most of our superfluous stuff.

And yet, we still struggle with keeping our kitchen/dining room tidy. Every flat surface ends up covered with random stuff that has no other home. Then I started seeing banquette seating all over Pinterest. I think that a bench seat for the dining area could really help use our space better, what with the stationary seating for the kiddos, the additional storage under the bench, and the overall cuteness of it.

Here are some of the diy banquettes that I love:

{Ana White}                          {Cape 27}

{Casa de Lewis}                         {Krys Melo

{Suburban Urbanist}                   {This Old House}

Thursday, April 11, 2013

Covered Canvas Tutorial


I came across an idea from Rachel at Always a Project that I instantly LOVED. She took canvases, covered them with book pages, then placed a fabric shape over the top of it to create a beautiful and unique wall decoration for her sewing room. Every time I look at her covered canvases, I am in awe at how fabulous they turned out.

So I decided to give it a try, with my own spin on it.

First, I gathered up some supplies:

8x10 art canvas
Old copy of Harry Potter and the Sorcerer's Stone
X-Acto knife
Ruler
Fabric
Mod Podge
Cardstock

Step 1 - Cut pages out of the book. Depending on how you'd like the result to look, you can either tear them for a jagged edge, or use the X-Acto and ruler to make a clean, straight cut. I went with a straight cut on mine, but I'd like to try a jagged look next time around.


Step 2 - Attach pages to canvas using a thin layer of Mod Podge. You can do all the pages the same direction or alternate them. I alternated mine.


Step 3 - Transfer your shape to back of fabric. For this first try, I went with a simple lightning bolt. I like how Rachel's looks better with the larger shapes that cover the majority of the canvas. Decide how large you want your shape, print it, then trace it onto the back of your fabric and cut it out.


TIP: Smaller shapes will fall apart. Reinforce your fabric with interfacing or by attaching it to card stock before cutting (see the next step).


Step 4 - I also wanted words from the page cut out of fabric on my canvas. So I chose my quote, laid it out in Illustrator, reflected it, and printed it on card stock. I used Mod Podge to attach my fabric to the opposite side of the card stock, then used the X-Acto to cut around the letters. You'll be cutting out backward letters, but when you turn them over, you'll have fabulous fabric letters that won't fall apart!


Step 5 - Then use more Mod Podge to attach all your fabric shapes to the canvas. Seal your book pages with more Mod Podge in an even coat over the top and edges. And you're done!


For a first try, mine turned out fine, but there are several things I would change. Because I'm sure you're dying to know, here they are:
  • Make the fabric shape larger.
  • Trim white edges off book pages for a more solid text look.
  • Plan out fabric placement on canvas better (because I ended up with extra space at the bottom)
(Linked at Seven Alive)

Wednesday, April 10, 2013

Home

My hubby and I are training for a sprint triathlon. We did this same race last year and it was a good way to motivate us to stay in shape. We signed up again this year, but I'm not quite as gung-ho. It might be because I am ten pounds heavier this year (seriously, what is the point of running if I'm still going to gain weight?!) or it might be that I don't feel like devoting much time to training. Nevertheless, we are registered and, therefore, committed. So I forced myself to go to the pool last night for my first swim workout of the year. As soon as I slipped into the water, I felt at home.

I have noticed more and more over the last few years that certain things trigger major nostalgia for me… and some of them are kind of weird. But since I am learning to embrace my weirdness, I would like to share a few of the things that instantly make me feel like I'm home… and I hope you will leave a comment sharing your (possibly weird) things that do the same for you.

Swimming pools


When I was a kid, I was a member of the local swim team in my hometown of Price, Utah. I had learned to swim very young and joined the swim team when I was 11 or 12. I swam with the Castle Valley Barracudas for about two years before my desire for popularity won out and I traded swimming for cheerleading. After all these years, though, lap swimming is one of my favorite things to do. It cuts me off from the world. It soothes my body and mind. It gives me time to think without distraction.

Orchards

Here I am in the apple orchard, hugely pregnant with my son in 2008.

My grandparents owned and operated a fruit farm for many years. We lived about 30 minutes away and would frequently go to help them with farm work, like picking up sticks, sorting apples, or thinning peaches. My grandma still lives there, but most of the trees are now gone. It makes me sad to see the empty space that was once filled with row after row of apple, pear, and peach trees. Though I don't miss the dirty, itchy work of thinning peaches, seeing an orchard always makes me miss those dusty days on the farm.

Lumber


We recently built some wooden shelving into our garage. My hubby bought the lumber and I helped him unload it. As we carried the wood into the garage, I commented on how much I love the smell of lumber. Dave just thought I was weird. When I was six years old, my family moved into a home with an unfinished basement. Over the years, my dad gradually worked on finishing it off, so we usually had a supply of 2x4's and sheetrock. The smell of lumber makes me think of an infinite potential.

It was smell that carried memory... Memories of smell didn't fade, and they short-circuited your entire psychology -- they didn't tunnel through endless experience or get loaded down by any part of your conscious mind. They stitched you instantly and fully to your other times, without regard to sequence.
                                                                My Name Is Memory by Ann Brashares
So what seemingly insignificant things are ingrained in your memory? Please share! I'd like to know it's not just me who loves the smell of lumber in the morning.

Tuesday, April 9, 2013

Quilt Along

I have a little bit of quilting experience, but nothing too extensive. I tied a couple of quilts as a teenager and sewed a couple of baby quilts as an adult. But I've never pieced a quilt. Until now, that is.

I have joined the "Quilt Along" organized by Jill from Create.Craft.Love. and Sarah from Becoming Martha. This way, I won't have to figure it out on my own! The quilt we will be making will end up looking something like this:


Of course, I'll choose my own fabrics. Since it is a twin size, I intend to make this for when Violet moves up to a big girl bed sometime in the next year. The Quilt Along starts on Friday! Who wants to learn to quilt with me? You know you want to, so click the link and sign up!

  Quilt-Along